

-1140x400w.jpg "Why Tripods Are Important for Photographers")
The why tripods are important for photographers questions sits right at the heart of any serious photography journey. From the first time someone trips over their camera strap on a windy hill to the satisfaction of printing a razor‐sharp 30″×20″ landscape, a solid tripod often marks the difference between “good enough” and “wow”. In this post for Geonline, one will explore how a tripod improves photo quality, when to use a tripod in photography, tripod advantages for landscape photography, why use a tripod for long exposure shots, how tripods help in low light photography—and much more.
Whether one is a beginner picking up their first DSLR or a seasoned pro travelling the globe, understanding the full value of a tripod is essential. And yes—I’ve been there, lugging a heavy tripod up a mountain at dawn and discovering exactly how it changed the result. In this article, we’ll cover everything: from stability and sharpness with a tripod to how to choose the right tripod for your camera, best situations to use a tripod, handheld vs tripod comparison, and practical tripod tips for professional photographers.
How a Tripod Improves Photo Quality
When one wonders how a tripod improves photo quality, there are clear, measurable benefits.
Stability and Sharpness with a Tripod
A core reason a tripod matters: it dramatically increases stability. Without one, small hand movements, shutter delays, even breathing can cause blur. As one source puts it: “The primary purpose of a tripod is to stabilize your camera before shooting.”
By locking the camera in place one can:
Use slower shutter speeds without motion blur.
Keep frame composition exactly the same across shots (essential for HDR, focus stacking)
Avoid the “oops we missed the moment because I adjusted focus and lost framing” syndrome.
Composition and Framing Improvements
Beyond sharpness, a tripod lets a photographer slow down and think. One writer says: “Photographing on a tripod gives you the time to consider each element in your frame…”
In practical terms:
One can fine-tune the horizon, foreground/ background relationship, off-center compositions.
One can set the camera, then step back and evaluate without worrying about holding it steady.
Over time, this builds stronger visual decisions and better finished images.
Raising Technical Quality
With a tripod, one is able to operate in conditions that would normally degrade quality: slow shutter speeds, low ISO, small apertures for depth of field, etc. As one article says: “Tripods make it possible to create better images using HDR, panoramas, and long exposures.”|
Thus the tripod becomes not just a support tool, but a gateway to more advanced photography techniques.
When to Use a Tripod in Photography
Knowing when to use a tripod in photography means a photographer uses it not just “always” or “never”, but strategically.
Low Light & Long Exposure Cases
In low light, handheld shots often require high ISO (which increases noise) or fast shutter speeds (which may under-expose). A tripod solves this. One blog states: “If you want to photograph in low light… you absolutely, one-hundred percent need a tripod.”
And for long exposures: moving water, star trails, city light trails—all demand the camera remain immobile for seconds or minutes. Without a tripod you’ll almost always get blur.
Macro, Panorama, HDR, Focus Stacking
Other situations:
Macro photography: very shallow depth of field, slightest movement ruins the shot.
Panoramas or HDR: need consistent framing across multiple shots.
Studio/portrait work where precision counts: even for group photos a tripod helps.
Travel / Handheld vs Tripod Decision
There are times when using a tripod may slow you down (especially in street/travel photography). As one reddit commenter notes:
“For most things low-light, you'll need a tripod… If you want to get into timelapses, you'll need a tripod.”
So you decide: Is the scene worth the extra setup time? If yes, use the tripod.
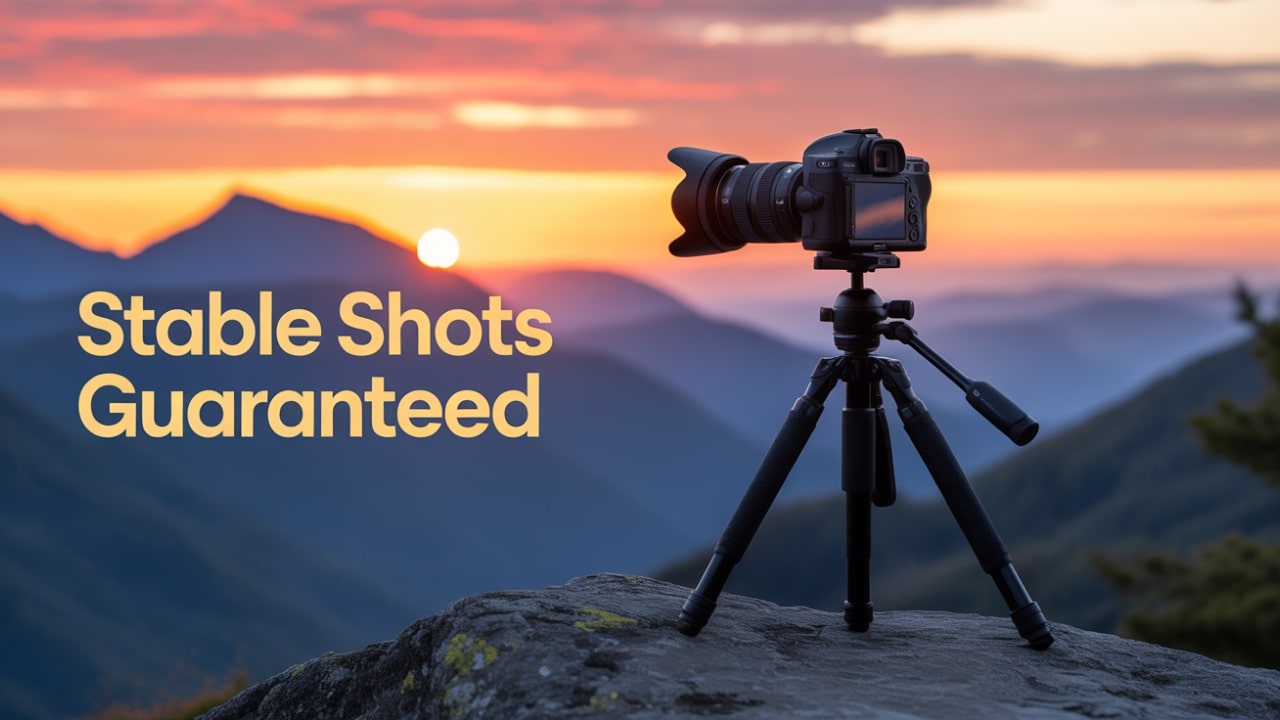
Tripod Advantages for Landscape Photography
Landscape photography arguably benefits the most from tripod use. Here’s how.
Why Landscape Photographers Use Tripods
The expansive scenes, often with wide depth of field, need both sharpness and thoughtful composition. A tripod gives you the freedom to:
Use small apertures (f/11 or smaller) for full depth of field.
Use slow shutter speeds to blur clouds or water for effect.
Set up the shot and wait for the perfect light (sunrise, golden hour).
As one landscape-oriented article states: “Tripods make landscape photography much more enjoyable, because they allow you to create higher quality images in every scenario.”
Real-World Example
Imagine standing on a rocky coastline at dawn. The waves crashing. You mount your camera on a tripod, pick f/16 for depth, set shutter to 4 seconds to smooth the water, frame the rocks in foreground, use remote release so your hands don’t introduce shake. That result is a sharp, dramatic landscape image. Without the tripod you might have raised ISO, used 1/30th of a second, and lost the fluid water effect or introduced blur.
Bonus: Time-Lapse and Panoramas
Many landscape shooters also use tripods for time-lapse sequences (more on this below), or for panoramas/stitching multiple vertical shots. Consistent framing matters and a tripod helps maintain that alignment.
Why Use a Tripod for Long Exposure Shots
The phrase why use a tripod for long exposure shots is critical for photographers exploring creative effects.
What “Long Exposure” Means
Long exposures involve shutter speeds beyond what you can effectively hand-hold—often 1/2 second, several seconds, or even minutes. These are used to capture motion: smoothing water, streaking clouds, car light trails, star trails.
How the Tripod Enables It
It fixes the camera in space so that only moving subjects are blurred; stationary elements remain razor-sharp.
It allows you to use lower ISO (reducing noise) and smaller aperture (for depth) without hand-shake issues.
It gives you time to fine-adjust focus, composition, and wait for the right moment (e.g., wave hitting rock).
Practical Tip
Use a remote shutter or self-timer, mirror-lock mode if available, ensure tripod legs are locked firmly, and avoid touching the camera while shutter is open. One blog suggests using tape or weight on the tripod base if wind is present.
How Tripods Help in Low Light Photography
For how tripods help in low light photography, the benefits again revolve around stability and control.
Challenges of Low Light
In low light you face: limited aperture (to retain depth of field), high ISO (introduces noise), slow shutter (hand-held risk of blur). Without a tripod you compromise one of these.
Tripod Solution
By anchoring the camera:
You can lower ISO, improving image quality.
You can slow the shutter to allow more light.
You can choose a smaller aperture for more depth.
One source: “A tripod is needed for using slower shutter speeds without risking a camera shake. This helps you maintain proper exposure and image quality.”
Scenario
Indoor wedding in dim light, or dusk landscapes: with a tripod you can set the camera, keep composition constant while lights fade, and capture high-quality frames instead of raising ISO to the max and getting grain.
How to Choose the Right Tripod for Your Camera
Choosing a tripod is not one-size fits all. Here’s a guide for how to choose the right tripod for your camera.
Key Factors to Consider
Load capacity – the tripod should safely support camera + largest lens you’ll use. Cheap ones bend under load.
Height & portability – consider travel vs studio: a travel photographer needs lighter, compact tripod; studio shooter may want full-size height.
Material – aluminum is common and affordable; carbon fiber is lighter and more vibration resistant (though more expensive).
Head type – ball head vs pan/tilt, gimbal for heavy telephoto, geared head for studio.
Leg locks / stability – twist vs flip locks; tripod stability in wind or uneven terrain matters.
Center column & low angle options – if you shoot macro or low ground angle, consider reversible centre post or spidery legs.
Durability / weather sealing – if you shoot rugged landscapes, water, sand protection matters.
Investment Rationale: Reasons to Invest in a Good Tripod
One of the semantic keyword groups: reasons to invest in a good tripod. Good tripods may cost more but last years, improve image quality, reduce frustration (cheap tripods often disappoint).
From experience: buying a cheap tripod felt smart initially, but when wind hit and the legs wobbled, I lost several frames. Later I upgraded, and the difference in keeper rate was significant.
Example Specification Table
Best Situations to Use a Tripod
When focusing on best situations to use a tripod, one can identify clear scenarios.
Top Use-Cases
Landscape photography at sunrise/sunset (low light, long exposures)
Macro or product photography (precise focus, composition)
Night photography / astrophotography (very long exposures)
Portrait or studio work where the frame must consistent
Time-lapse sequences (camera must stay fixed)
HDR and panoramas (multiple shots, identical framing)
Travel photography if you have the spare time and want optimal quality
Handheld vs Tripod Photography Comparison
Comparing handheld vs tripod:
With handheld: more mobility, faster setup, good for spontaneous shooting, but higher risk of blur, lower ultimate sharpness.
With tripod: slower setup, heavier gear, less mobility—but higher image quality, more creative control, better for advanced techniques.
One article explains: “Tripods are far more stable … While a monopod can reduce camera shake … a sturdy tripod can eliminate camera shake completely.”
Travel Photographers’ Perspective
For travel photographers: why travel photographers carry tripods is a key question. Even though gear weight matters, a light but sturdy tripod allows capturing epic landscapes, cityscapes at dusk, star trails, and ensures you don’t compromise just to avoid setup. Some mobility sacrifices pay dividends in final output.
Photography Techniques with Tripod Support
Using a tripod opens up many photography techniques with tripod support that are harder or impossible handheld.
Time-Lapse Photography
One technique: using tripods for time-lapse photography. Since many frames are taken over minutes or hours, camera position must stay constant. A tripod is foundational.
Night Photography & Star Trails
Tripod setup for night photography involves long exposures, low light, careful composition. Without a tripod, the scene goes soft. With one you can wait for perfect alignment of stars, or smooth water reflections, and capture sharp, rich images.
Macro Photography
How a tripod helps in macro photography: because you often work with tiny depth-of-field and maybe slower shutter speeds, any camera shake is magnified. The tripod removes that variable.
Composition, Framing & Slowing Down
A nice side-effect: a tripod forces you to slow down. That improves composition decisions. As one writer said: “It slows you down… shooting slowly is often a good thing.”
In that slower process, one becomes more intentional—leading to stronger images, not just technically sharp but emotionally compelling.
Tripod Tips for Professional Photographers
For those wanting to elevate their craft: tripod tips for professional photographers.
Setup & Stabilization
Always lock each leg firmly.
Use the centre column only if necessary: a lower centre of gravity is more stable.
Spread the legs wide for maximum stability, especially in wind.
Add a bag or weight to the centre hook when conditions are windy.
Use a remote trigger or self-timer to avoid camera shake when pressing shutter.
Turn off image stabilization (many lenses/cams require this when mounted on tripod).
Transport & Maintenance
Use padded tripod bag for travel.
Clean and lubricate leg locks periodically, especially after sand/water exposure.
Carry a compact travel tripod for hiking/travel days and full-size tripod for planned shoots.
Choosing Head & Accessories
Quick release plate saves time between handheld/tripod.
Consider a leveling base for panoramic or uneven ground.
Use bubble level to ensure horizon is straight.
For video or panning, use a fluid head — many still-photo tripods will work but limit fluidity.
Workflow Integration
Set up tripod first, compose, focus, re-check framing.
Once camera is locked, resist adjusting by hand—move the tripod head or legs instead.
For HDR or panorama, lock camera and take multiple frames with same settings.
For shooting long exposures, use mirror lock-up (if SLR) or electronic shutter to reduce vibration.
Importance of Tripod for Beginners in Photography
If you’re just starting out, the importance of tripod for beginners in photography cannot be overstated.
Why Every Beginner Should Consider One
It helps produce sharper images even when technique isn’t perfect yet.
It encourages slower, more thoughtful shooting rather than snap-and-hope.
It opens creative doors early (low light, long exposure, better composition).
It ingrains good habits: checking framing, locking tripod, secondary elements.
Avoiding Common Beginner Mistakes
Don’t buy the cheapest possible tripod; cheap ones may flex and ruin results.
Don’t rely on monopod when you need full stability; understand differences.
Don’t forget to practice tripod setup so you don’t lose shots — the tripod should feel natural, not a burden.
Benefits of Using a Tripod in Photography
Let’s summarise the benefits of using a tripod in photography—the key take-aways.
Improved sharpness and clarity: fewer blurred shots.
Ability to shoot in challenging conditions (low light, long exposure, macro).
Better composition and framing control.
Consistent results across frames (panorama, HDR, time-lapse).
Freedom to use creative techniques and gear (filters, telephoto, remote triggers).
Higher quality output—printable large, usable for professional work.
Confidence: knowing your camera is steady so you can think about light and story rather than technical jitter.
People Also Ask (FAQ)
Q1: What is a tripod and why do photographers use one?
A: A tripod is a three-legged camera support that stabilises the camera and allows precise framing. Photographers use one to eliminate camera shake, improve sharpness, enable slow shutter speeds, and take higher-quality images.
Q2: When should a photographer use a tripod?
A: Use a tripod when shutter speeds are too slow to hand-hold (e.g., low light, long exposure), when you need exact framing (panorama/HDR), or when you’re using a telephoto lens or shooting macro.
Q3: How does a tripod improve photo quality?
A: It ensures the camera remains fixed, allowing sharper images, lower ISO usage, better composition, and enabling techniques like long exposure, focus stacking, and time-lapse.
Q4: Do travel photographers really need tripods?
A: Yes—while mobility is key, even a compact travel tripod can enable stunning landscapes, dusk cityscapes, or star trails that would be impossible handheld. It often separates casual snapshots from fine art.
Q5: Are all tripods the same quality?
A: No—tripods vary in load capacity, material, height, leg stability, head type, and durability. Investing in a good one improves usability and results; cheap models can introduce flex, vibration, or insufficient support.
Q6: Can I shoot without a tripod if I have image stabilisation?
A: While image stabilisation helps, it cannot replace the firm grounding of a tripod for long exposures, telephoto lenses, macros, or situations requiring exact framing. A tripod is still preferred in many scenarios.
Q7: What mistakes should beginners avoid when using a tripod?
A: Beginners should avoid buying too cheap, neglecting to lock leg joints, extending the centre column too much (which decreases stability), not using a remote shutter or self-timer (introducing vibration), and forgetting to consider wind or unstable ground.
Final Thoughts
In the journey of photography, the decision to use a tripod often marks a shift from “quick snapshots” to “intentional image-making”. On behalf of the team at Geonline, the author can attest: ever since they began carrying a quality tripod, the keeper rate increased, the range of creative options expanded, and the joy of seeing a final print that matched what was in their mind became real.
Leave a Comment