


When a photographer picks up a lens and asks “what are camera lens filters?”, they’re actually opening the door to a powerful set of tools. Filters sit between the front of the lens and the world, shaping light, protecting glass, and sparking creativity. In this article from Geonline, you’ll learn in depth what lens filters are, how they work, and how you can choose and use them with confidence.
Whether you’re a beginner wanting to know the difference between a UV filter and a polarizing filter, or a more advanced shooter curious about stacking filters, variable NDs for long-exposure photography, or filter compatibility issues — this guide has you covered.
What Are Camera Lens Filters?
The phrase what are camera lens filters means exactly what it says — these are transparent, semi-transparent or coloured pieces of glass or resin that attach to the front of a camera lens or are inserted into a holder. Their job is to modify or enhance how light enters the lens, or to protect the lens element itself.
How they fit in
They screw onto or fit into front threads of the lens (screw-in filters) or slide into holders (square/rectangular types).
Some filters are permanently left on the lens for protection; others are swapped in/out depending on the shooting situation.
Their use is not only creative, but technical — for example, limiting light, correcting colour, reducing reflections.
Why they matter
Without filters you’re limited to what the lens and sensor can do. Filters expand your “in camera” control.
Some effects simply can’t be replicated (or easily replicated) in post-processing (e.g., true polarisation).
They help preserve image quality and give you creative options, especially in challenging light.
Thus, when we ask what are camera lens filters, the answer is: they are a bridge between scene and sensor, giving you control over what light gets through, how it gets through, and how it’s modified before hitting your sensor.
How Do Lens Filters Work in Photography
Understanding “how lens filters work” gives you the confidence to choose the right one, use it well, and avoid mistakes.
The basic mechanism
Filters are essentially pieces of glass or resin that alter light by blocking, reducing or modifying certain wavelengths or types of light.
For example: a neutral density (ND) filter reduces overall light intensity without altering colour; a polarizing filter blocks certain polarised light waves.
Because you’re adding an optical element in front of the lens, there can be consequences — like light loss, vignetting, or image-quality degradation if the filter is low quality.
Practical consequences
You may need to adjust exposure to account for a filter (especially ND filters).
Some filters affect autofocus/metring (e.g., linear polarizers vs circular).
Filter size, compatibility, lens angle of view all matter (to avoid issues like vignetting).
Example in action
Imagine you’re photographing a waterfall in bright daylight. Without a filter you might stop the aperture down to f/22 to slow the shutter, but image quality will suffer (diffraction). If you use an ND filter to cut light by 8 stops, you can use f/11 and a shutter speed of 2 seconds to get that silky water effect.
In short: lens filters work by intervening in the light path before the sensor, giving you more control and possibilities.
Types of Lens Filters Explained
Here we break down the major filter types, what they do, and when you’d use them.
UV / Protective Filters
Often the most basic filter. Originally designed to block ultraviolet light and haze, nowadays primarily used for lens protection.
Advantages: helps protect front element of lens from scratches, dust, moisture.
Disadvantages: may introduce extra glass and thus slight loss of image quality; some argue it’s not needed with modern digital sensors.
Polarizing Filters (CPL)
A polarizer (also circular polarising filter) cuts reflections from non-metallic surfaces (water, glass), deepens skies, boosts saturation.
Two types: linear and circular. Circular is preferred nowadays because it doesn’t interfere with autofocus/metring.
Useful especially in landscape, outdoor shooting.
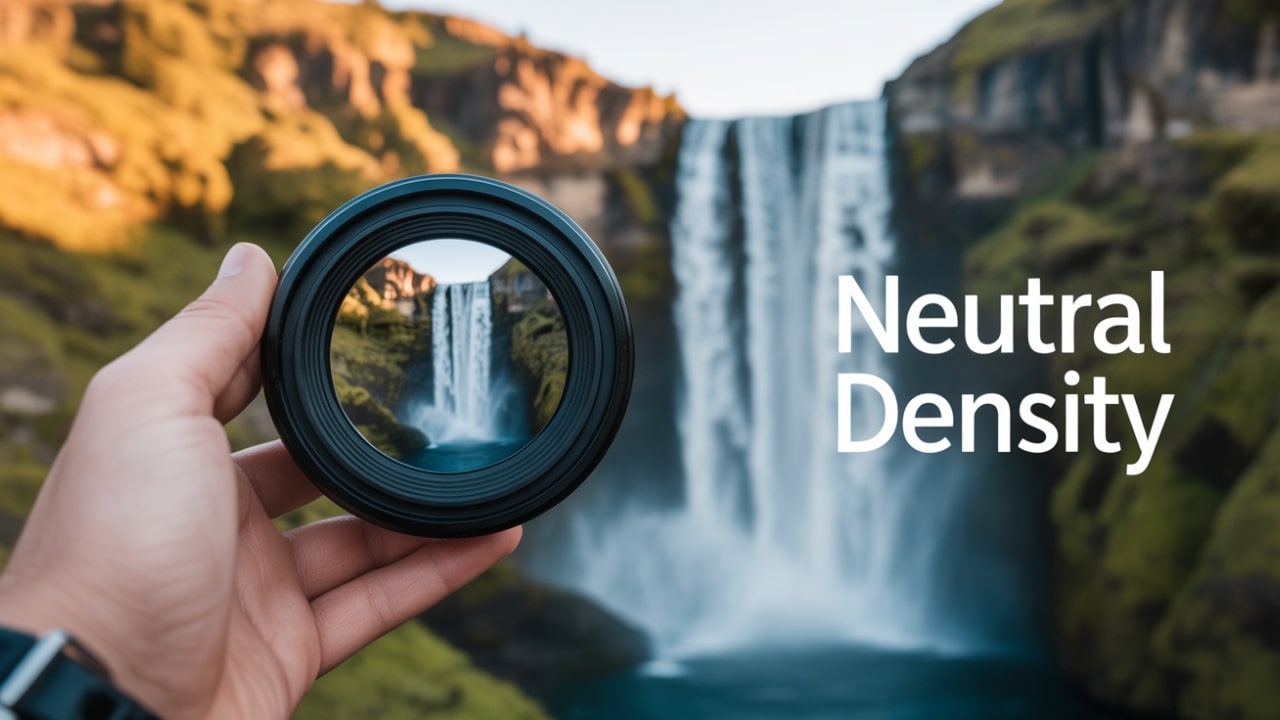
Neutral Density (ND) Filters
Reduce the amount of light entering the lens, without changing colour. Great for long exposures, wide apertures in bright light.
Example uses: silky water, motion blur, shoot at f/1.8 in bright sun, video with shallow depth of field under bright light.
Graduated ND Filters
Half clear, half dark. Used to balance scenes where the sky is much brighter than foreground (common in landscape).
Typically used with square/rectangular holders.
Colour-Correcting, Effect Filters
Filters that change colour balance (warming, cooling), or add creative effects (star burst, diffusion).
Summary Table
UV Filter vs Polarizing Filter
When someone asks “UV filter vs polarizing filter”, they’re really asking: should I get a protective UV filter or a polarizer for photography? Here’s how to compare.
UV Filter
Clear or slightly tinted glass. Blocks ultraviolet light (in film days). Now mostly for protection.
Benefits: keeps your precious lens safe from scratches, dust, rain.
Drawbacks: minimal effect on digital images, if low quality can degrade image.
Polarizing Filter
Actively changes how light behaves by rotating to block polarised light. Cuts glare, enhances colour.
Benefits: real creative tool, not just protection; effect often cannot be mimicked in post.
Drawbacks: reduces light (typically 1-3 stops), must rotate/filter for effect, may interfere if low quality.
When to use each
Use UV/protection filter: When you just want to protect your lens, especially in rough conditions (travel, beach, children’s play).
Use polarizing filter: When you care about reflections, skies, water, and colour richness — e.g., landscapes, architecture.
My experience (third-person style)
From the author’s experience, the UV filter sat on the lens almost as a “helmet” — always there, rarely touched — whereas the polarizer went on only when the light cooperated and the scene demanded it. The difference in results was very noticeable when shooting lakes and reflective surfaces.
ND Filter for Long Exposure Photography
Using a ND filter for long exposure photography unlocks dramatic effects.
Here’s how and when.
Why use ND for long exposure
Without an ND filter, bright daylight may force you into shutter speeds that are too fast to show motion (water streaks, clouds, traffic).
An ND filter reduces light, allowing you to extend shutter speed while keeping aperture/ISO at desired settings.
Example: You’re shooting a waterfall in midday. You want a 5-second shutter to get silky flow, but even at f/16 and ISO 100 your shutter is 1/250s. Attach an 8-stop ND and you get ~10 seconds!
Practical tips
Use a tripod — long exposures require stability.
Use remote shutter or self-timer to avoid camera shake.
Be aware of filter factor (some NDs reduce light by 8,10 stops,…).
Watch for colour cast — some cheap NDs add unwanted colour shift.
In very long exposures the sensor may heat up — consider using shorter exposures or break up your shots.
When to use
Flowing water (rivers, waterfalls)
Cloud movement
Crowded scenes where you want to blur people/traffic
Video with shallow depth-of-field in bright sun
Words of caution
An ND filter blocks light, so your viewfinder may be dark — use live view or adjust in advance.
Stack too many filters and you may experience vignetting or image softness.
Circular Polarizer Filter Explained
The term circular polarizer filter explained invites us to explore what a circular polarizing filter (CPL) is and why it’s preferred.
What is a circular polariser
A circular polarizer (CPL) combines a linear polarizer with a quarter‐wave plate to convert polarised light into circularly polarised before the sensor. This prevents autofocus/metring issues in modern cameras.
Rotating the filter changes the angle of polarisation, adjusting how much reflection is cut or how deep the sky becomes.
How to use it
Attach to front thread of lens (check size).
Look through viewfinder/LCD while rotating the filter ring; you’ll see reflections change and sky colour shift.
Use especially when the sun is roughly 90° to your shooting direction (for strongest effect).
Be cautious when using wide-angle lenses: heavy CPL + wide angle may cause uneven effect or dark corners.
Benefits
Reduces glare from water/glass.
Makes skies deeper blue, clouds pop, foliage richer.
Enhances clarity in landscape shots.
Limitations
Reduces light (1-3 stops) — you may need to compensate.
If used wrongly (e.g., sun directly behind lens), effect may be weak.
Rotating mechanism means added bulk; stacking with other filters may complicate things.
How to Use Lens Filters for Landscape Photography
In landscape photography especially, understanding how to use lens filters for landscape photography makes a big difference.
Key filters for landscapes
Circular polarizer: reduce reflections in water, emphasize sky/foliage.
ND / Graduated ND: manage brightness differences (sky vs ground) or slow motion in water/clouds.
UV/Protection: always good for outdoor rugged use.
Tips & workflow
Plan: check the light, where sun is, horizon line, foreground interest.
Attach a circular polarizer if you have water, reflective surfaces, or sky concerns. Rotate to find best effect.
Use a graduated ND if the sky is too bright and you want balanced exposure. Align the filter with the horizon.
Use a strong ND if you want motion blur in water or clouds.
Keep lens hood and check for vignetting: wide-angle lenses plus filters may cause dark corners.
Review image at 100% to check for softness or colour cast due to filter.
Remove filters when they’re not needed — any extra glass is another chance for flare or loss of sharpness.
Real-world example
The author recalls a dawn shoot over a river: they used a CPL to cut glare off the water and deepen the sky, then attached a 3-stop ND to slow shutter for 1.5 seconds so the water had a smooth flow. The filters combined gave a dreamy look, unavailable without them.
Variable ND Filter Guide
A variable ND filter guide helps you understand this modern filter type, its benefits, and caveats.
What is a variable ND
Instead of a fixed-stop ND, a variable ND allows continuous adjustment (e.g., from ND2 to ND8) by rotating two polarising elements.
Useful for video or situations where light changes (sunset, moving clouds).
Benefits
One filter can cover many stops of light reduction.
Great for video where you need to maintain shutter speed while light changes.
More versatile kit-wise (one filter, multiple lenses via adapter rings).
Limitations & caution
Some variable NDs introduce “X-pattern” artefacts in very dense settings (cheap ones).
Quality matters: cheap variable NDs may degrade sharpness or introduce colour cast.
Stacking further filters on top may cause vignetting or optical issues.
At extreme light reduction, you may lose autofocus/contrast performance.
Usage tips
Buy from reputable brand if going variable.
Always check for image quality degradation before critical shoot.
For stills, if you don’t need constant adjustment, a fixed ND may give better image quality.
Use variable ND especially for video, or rapid transitions in light.
Best Lens Filters for Beginners
Now, what are best lens filters for beginners? If you’re building your kit and want to start smart, here are recommendations.
Starter filter list
A good UV/protection filter: basic, affordable, gives peace of mind.
A circular polarizer: opens creative options.
A modest neutral density (e.g., 3-5 stops) for occasional long exposure.
What to look for
Fit your lens’s filter thread size (see next section).
Ensure good build and optical quality (thin ring, multi-coatings).
Avoid ultra-cheap generic filters that may degrade image or introduce flare.
If you have one lens, start with size that matches it. Later use adapter rings or step-up rings to use same filter on multiple lenses.
Budget advice
Rather than buying many specialised filters, focus on one or two well-made filters that cover many uses. The author found that spending a little more on a good polarizer paid off in image clarity and satisfaction, rather than buying a dozen cheap filters.
When to Use UV Filters on Camera Lenses
The question when to use UV filters on camera lenses is debated. Let’s clarify.
Use cases
Outdoor work in rough environments (beach, sand, children, travel) where lens front might get damaged.
When you don’t plan to remove filter and prefer to leave a protective glass element in front of front element.
When you have no other filter attached and want something minimal in front of the lens.
When they may not be necessary
In controlled studio environment where you have lens hood and no chance of lens damage.
If image quality is critical and you suspect the UV filter may degrade it. Some lens manufacturers don’t recommend always leaving a filter.
If cost/weight is minimal concern and you prefer no extra glass.
My insight
From the author’s experience: When hiking dusty trails and swapping lenses often, the UV filter saved the day by taking grit, dust and minor scratches rather than the lens itself. But for critical landscape work, they sometimes removed even the UV filter to maximise sharpness and avoid reflections introduced by the extra glass.
How to Attach Filters to Your Camera Lens
Here's a practical section on how to attach filters to your camera lens, to avoid mounting mistakes.
Steps
Check your lens’s filter thread diameter (usually printed on lens: e.g., “Ø 67 mm”).
Ensure you have a filter of that diameter (or step-up ring if you have one filter for multiple lenses).
Clean both lens front and filter surface before attaching (dust + fingerprints degrade image).
Screw the filter gently onto lens threads until snug — avoid over-tightening.
If using a polarizer, orient/rotate the filter to achieve effect after mounting.
If using a holder with square filters (for wide angle or multiple filters) attach adapter ring, then holder, then slide filter in. Confirm no vignetting.
After filter is attached, re-check focus/zoom/angle because adding filters (especially thick multi-stack) may affect angle of view or visibility.
Best practices
Use lens hood even with filter to prevent stray light.
Double-check rotation of polariser and confirm you’re not cutting too much light for your exposure.
Remove filters when not needed to minimise optical elements in front of lens.
Keep filter caps on when storing.
Lens Filter Size and Compatibility Guide
The section lens filter size and compatibility guide is crucial because mismatched sizes cause problems.
Key concepts
Filter size = diameter of the front thread of the lens, measured in millimetres (e.g., 52mm, 72mm).
A filter must match your lens’s thread, or you must use an adapter (step-up or step-down ring).
“Step-up” ring: allows you to use a larger diameter filter on a smaller lens thread (recommended over “step-down” because step-down may cause vignetting).
Wide-angle compatibility: On ultra-wide lenses, thick filters or stacking filters may cause vignetting (darkening at corners).
Compatibility table (example)
Practical tips
If you have several lenses with different sizes, consider buying one larger filter size (largest lens) and step-up rings for the others.
Use “slim” filters for wide-angle lenses. These have thinner rings to reduce vignetting.
Always test filter on lens in real shoot situation (with same focal length) to check for vignetting or optical issues.
Difference Between ND and CPL Filters
A frequent question: difference between ND and CPL filters (ND = Neutral Density, CPL = Circular Polarizer).
ND Filter
Purpose: reduce total light reaching sensor (without changing colour) so you can use slower shutter or wider aperture.
Doesn’t specifically reduce reflections or saturate colours — its job is exposure control.
CPL Filter
Purpose: reduce reflections/glare, deepen skies, boost saturation. Also reduces light (some stops) because you’re altering how light enters.
It is directional (you rotate to adjust effect) and has a different mechanism.
Comparison
My advice
If you must pick one first, for most everyday photography a CPL offers more creative benefit. But if you’re into long exposures or controlling motion blur, an ND may be more beneficial.
Protective Filters for Camera Lenses
Let’s look at protective filters for camera lenses — what they are, pros and cons.
What are they
A protective filter is often a clear or UV filter left on lens to safeguard the front element from damage: scratches, dust, spills, impact.
It is not intended to change the image (much) but to act as a sacrificial layer.
Pros
Peace of mind: if the filter breaks, your lens (much more expensive) is likely safe.
Easier to clean/replace than lens front element.
Adds minimal (if any) cost to your kit.
Cons
Adds another glass surface: risk for flare, ghosting, slight sharpness loss (especially poor quality filters).
Some lenses are engineered to work best at certain optical configurations and adding a filter may slightly shift that.
If you stack protective + creative filters, you increase risk of optical issues.
My experience
On a travel shoot in windy sandy conditions, the photographer used a high-quality clear filter throughout. Midway a tiny rock chip struck the filter but the lens survived intact. The cost and hassle of replacing the filter was trivial compared to repairing the lens.
How Lens Filters Affect Image Quality
The heading how lens filters affect image quality addresses one of the most important considerations.
Positive impacts
Good filters can enhance saturation, reduce unwanted reflections, improve mood of image (e.g., CPL, ND).
They allow creative control in-camera rather than relying entirely on post-processing.
Negative impacts (if not careful)
Each extra glass surface can introduce:
Light loss (requiring compensation)
Extra reflections/flare if coatings are sub-par
Sharpness degradation if the filter is low quality or misaligned
Colour cast (especially with cheap NDs)
Vignetting on wide-angles due to thickness or stacking filters
Quality matters
Choose filters made of good optical glass or resin, thin or slim profile rings, multi-coated to reduce reflections.
Matching the filter size exactly and avoiding excessive stacking helps preserve image integrity.
My reflection
The author once used a very cheap unbranded ND filter and noticed slight softness and magenta colour cast in corners during long-exposure work. Upgrading to a higher quality filter eliminated that issue. Lesson: filters are not free if image quality matters.
Filter Stacking Tips and Precautions
The section titled filter stacking tips and precautions is for advanced users who might use multiple filters together.
What is filter stacking
Attaching more than one filter on top of another (e.g., UV + CPL + ND) or combining fixed ND + variable ND, etc.
Sometimes used to combine effects (e.g., ND for slow shutter + CPL for reflection control).
Tips for stacking
Keep the number of filters minimal — every layer adds glass and potential issues.
Use slim filters or high-quality thin rings especially on wide-angle lenses to avoid vignetting.
Watch for image softness: if stacking too many, you may degrade sharpness.
Ensure filters are clean and aligned (especially square filters) to avoid mis-alignment effects.
Test the combination before critical shoot — some filters may interact in unexpected ways (for example, variable ND + CPL may produce artefacts).
Consider whether alternatives exist (e.g., one variable ND vs stacking fixed ND + polariser).
Precautions
On ultra-wide lenses, stacking may cause serious vignetting or dark corners.
Over-stacking may compromise autofocus/metring (especially with cheap filters) or lens hood fit.
Removing filters when not needed often yields sharper, cleaner results.
My practical insight
The author once stacked a CPL and a 10-stop ND filter for a riverside sunset shoot. The combination worked but they noticed corners slightly darker. On next outing they decided to remove the UV protection and only use the CPL+ND combination, which improved results. Simplicity often wins.
Creative Effects Using Camera Filters
Now to one of the fun parts: creative effects using camera filters — how filters allow you to add mood and unique vision.
Examples of creative uses
Silky-smooth water: use ND filter to slow shutter and blur water flow.
Deep dramatic sky: use CPL to darken sky and make clouds pop.
Colour shifts: use warming/cooling filters or tinted filters for mood in portraits or landscapes.
Starburst or diffraction: some effect filters (star filters) add creative star shapes around light sources.
Motion blur in traffic/night: use ND + long exposure to capture light trails.
Reflection control: CPL used creatively to show what’s beneath water instead of surface glare.
Creative workflow
Begin with a vision: “I want this scene to feel peaceful and dreamy.”
Choose filter(s) that help: ND for smoothness; CPL for reflection control.
Plan exposure accordingly (tripod, correct shutter/aperture/ISO).
Review result: adjust filter strength, rotation (for CPL) or stacking as needed.
Post-process with subtlety; the in-camera effect should already deliver most of the look.
My anecdote
During golden-hour coastal shooting, the author used a 6-stop ND and a CPL. The result: the water looked glassy, the sky deepened, reflections calm. That combination created a “quiet” mood which matched the moment. Without filters, post-processing could mimic some of it, but the in-camera result was stronger.
How to Clean and Maintain Lens Filters
Good filters last a long time — but only if you care for them. Here’s how to clean and maintain lens filters.
Cleaning routine
Always remove obvious dust first with a blower or soft brush.
Use a microfiber cloth or optical cleaning tissue with lens-safe cleaning solution.
Wipe gently in circular motion from centre outwards.
Avoid pressing too hard; coatings may scratch.
Clean the threads too so filter screws on smoothly.
Maintenance tips
Keep filters in protective case when not in use.
Avoid stacking filters in the case where they may scratch each other.
Periodically inspect for haze, micro-scratches, or coating separation.
If filter has damage (scratch, coating chip) consider replacing — the filter cost is much lower than lens replacement.
Store in cool dry place; avoid extreme humidity or heat.
My practice
The author always carries a small cleaning cloth, blower and filter pouch in the camera bag. On one shoot after sand spray at a beach, cleaning the filter afterwards prevented micro-abrasions. The filter took the abuse — the lens didn’t.
K&F Concept and Hoya Filter Comparison
When diving into quality filters you’ll often see brands like K&F Concept and Hoya. Here’s a simple comparison to help you choose.
Brand overview
Hoya: Established brand, long history in optical filters and lenses, good reputation for optical quality and coatings.
K&F Concept: More recent, offers good quality at more affordable price point, appealing for beginners and those on budget.
Comparison factors
My recommendation
For a beginner starting out, K&F Concept offers very good value and helps you get going without breaking the bank. However, if you invest in a high-end lens and expect top optical performance (especially for prints/blow-ups), going with a Hoya filter might be worth the extra cost. The author upgraded their kit filter to Hoya when moving to a 50 MP full-frame system; the difference in clarity and minimal colour cast was noticeable.
Essential Filters Every Photographer Should Have
Finally, let’s list essential filters every photographer should have in their kit.
Core set
A good quality circular polarizing filter (CPL).
A mid-range neutral density filter (e.g., 3-5 stops) or variable ND if you do video.
A quality UV/protection filter for daily use.
If you shoot landscapes in contrasty light: a graduated ND (GND).
Additional optional filters
Strong ND (8-10 stops) for long exposures.
Creative effect filters (star, diffusion, warming/cooling) for portraits or specialty work.
Step-up/step-down rings to use one filter size across multiple lenses.
Filter cleaning kit and protective cases.
Putting it into practice
The author recommends: “Start with the polarizer. Use it until you are comfortable with its effect. Then add the ND for long exposures. Then protect your lens with the UV. Once that foundation is set, explore graduate or creative filters.” This progression ensures you’re not overwhelmed and you understand each filter’s impact before buying more.
People Also Ask (FAQ)
Here are some frequently asked questions — ready for quick reference and featured-snippet friendly.
Q1. What are camera lens filters used for?
Answer: They are used to modify light entering the lens — to reduce reflections, cut excess light, protect the lens surface, balance exposure, or add creative effects.
Q2. How do you choose the right size filter for your lens?
Answer: Check the filter thread diameter printed on the lens (e.g., “Ø 67mm”), then buy a filter with that diameter or use a step-up ring. Use slim filters or adapters for wide-angle lenses to avoid vignetting.
Q3. Does a UV filter improve image quality?
Answer: Usually not significantly for modern digital sensors. Its main value today is protecting the front of the lens rather than improving image quality.
Q4. When should I use a circular polarizer filter?
Answer: Use it outdoors when there are reflective surfaces (water, glass), when shooting skies or foliage, or when you want deeper colours and less glare. Rotate the filter to see the effect.
Q5. What is the difference between ND and CPL filters?
Answer: An ND filter reduces all light evenly to enable longer exposure or wider apertures; a CPL filter reduces polarized light and reflections, improves colours and contrast.
Q6. Can I stack filters on my lens?
Answer: Yes, but stacking increases optical surfaces, risk of vignetting, softness, and flare. Use high-quality thin filters and test the result carefully.
Q7. How do I clean and maintain my lens filters?
Answer: Use a blower/soft brush to remove dust, then a microfiber cloth and lens-safe cleaning fluid to gently wipe from centre outward. Store filters in protective cases and avoid stacking in storage to prevent scratches.
Final Thoughts
In exploring what are camera lens filters, we’ve seen that filters are far more than optional extras. They are tools of precision, creativity and protection. The best photographers don’t treat filters as after-thoughts; they integrate them into their vision and workflow.
From the author’s own journey: beginning with a humble UV filter for protection, then discovering the game-changing effect of a polarizer, and later mastering long-exposure shots with an ND filter — each step added clarity, capability and confidence. By building a thoughtful filter kit and understanding how and why each filter is used, you unlock more of your creative potential.
Leave a Comment